When you pour a glass of beer or wine, clarity matters. A cloudy beverage might taste fine, but that haze makes people wonder if something went wrong. This is where bentonite in brewing becomes your best friend. This natural clay has been helping brewers and winemakers achieve professional clarity for decades, and once you understand how it works, you’ll wonder how you ever brewed without it.
What Is Bentonite and Why Do Brewers Use It?
Bentonite is a clay mineral formed from volcanic ash deposits. The name comes from Fort Benton, Montana, where it was first discovered in 1898. Today, some of the highest quality deposits come from Wyoming, which is why you’ll sometimes hear it called “Wyoming clay.”
What makes bentonite special is its electrical charge. When hydrated, this clay carries a negative electrical charge that attracts positively charged proteins floating in your beer or wine. These proteins are what cause that frustrating haze you see in the glass. When bentonite binds to these proteins, they become too heavy to stay suspended and fall to the bottom of your fermenter.
Brewers and winemakers use bentonite primarily as a fining agent. Fining is the process of removing suspended particles that create cloudiness. But bentonite does more than just clear your beverage. It also removes protein haze that can form when beer gets cold (called chill haze), stabilizes the beverage for longer shelf life, and can even reduce certain off-flavors.
CMS Industries, a leading bentonite manufacturer based in Gujarat, India, produces food-grade bentonite specifically for brewing applications. Their strategic location near Mundra and Kandla ports makes them a reliable supplier for brewers across India and beyond.
How Bentonite Works in Beer and Wine
The science behind bentonite is straightforward but fascinating. Your beer or wine contains proteins from malt, yeast, and other ingredients. These proteins carry a positive electrical charge. When they meet negatively charged bentonite particles, they stick together through electrostatic attraction.
Once bound together, the bentonite-protein complex becomes dense and heavy. Gravity pulls these complexes down to the bottom of your fermenter or carboy, leaving clear liquid above. This process is called flocculation, and it happens naturally over several days to two weeks.
Here’s what makes bentonite different from other fining agents. Unlike gelatin or isinglass, bentonite is non-selective. It removes all types of proteins, not just specific ones. This makes it powerful but also means you need to use the right amount. Too much bentonite can strip away foam-positive proteins that give your beer that nice, stable head.
Temperature plays a role too. Cold temperatures enhance bentonite’s negative charge, making it more effective at binding proteins. That’s why many brewers chill their beer to around 45°F before adding bentonite, though room temperature works adequately for most applications.
Types of Bentonite for Brewing
Not all bentonite is created equal. For brewing purposes, you want sodium bentonite rather than calcium bentonite. Sodium bentonite swells more when hydrated and works better in the acidic environment of beer and wine.
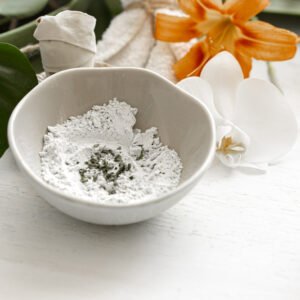
The bentonite you buy should be food-grade, not the industrial stuff used for sealing ponds or cat litter. Food-grade bentonite from suppliers like CMS Industries meets safety standards and won’t introduce unwanted flavors or contaminants into your beverage.
Some brands market “instant” or “quick-dissolving” bentonite that hydrates faster, but standard bentonite works just as well if you give it proper preparation time. The key difference is particle size, with finer particles dispersing more quickly.
Preparing Bentonite Slurry: Step-by-Step
Proper preparation is the most important part of using bentonite. If you skip this step or rush it, the clay will just sink to the bottom of your fermenter and do nothing. Here’s how to do it right.
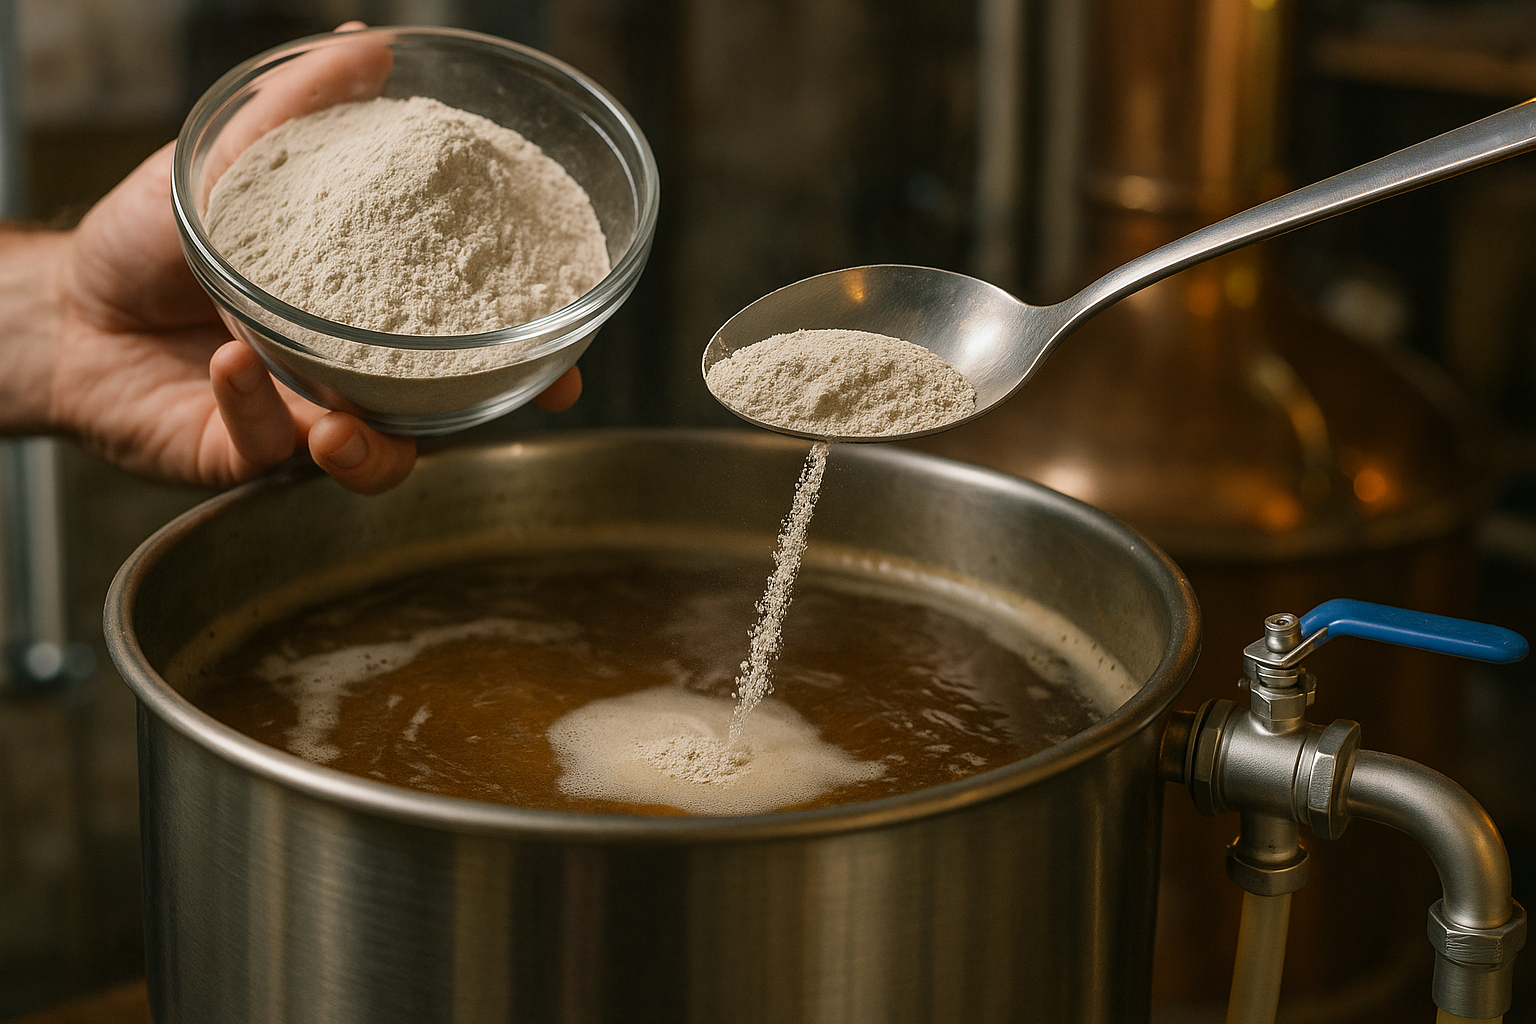
Start by measuring your bentonite. For beer or wine, you typically need 2 to 9 grams per 5 gallons (19 liters) of liquid. Start with the lower end, around 3 grams or half a teaspoon, especially for your first attempt. You can always add more later if needed.
Heat water to between 140°F and 200°F. You need about half a cup of hot water per 3 grams of bentonite. Hot water is critical because it helps the clay particles swell and become fully hydrated.
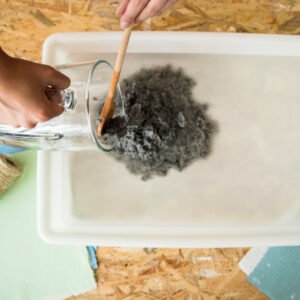
Mix the bentonite into the hot water slowly while stirring vigorously. Use a whisk or blend it in a blender for 1 to 2 minutes. The powder will clump as it absorbs water, so break up these clumps with your whisk or the back of a spoon. What you’re making is called a slurry, which should have the consistency of thin cement.
Let the slurry rest for at least one hour, though many brewers prefer to wait 24 hours. This resting period allows the bentonite granules to fully hydrate and expand. Cover the container to keep it warm and prevent contamination. Before using the slurry, stir it again because the bentonite will have settled.
When to Add Bentonite: Before or After Fermentation
This is where brewing gets interesting because you have options. Each timing choice has different advantages.
Adding Bentonite Before Fermentation
Some winemakers, especially those using kits, add bentonite right at the start before pitching yeast. This method takes advantage of carbon dioxide bubbles produced during fermentation. As CO2 bubbles rise through the liquid, they carry bentonite particles up with them. When the bubbles pop at the surface, the bentonite falls back down, picking up proteins along the way.
This circulation continues throughout fermentation, giving the bentonite more time to work. By the time fermentation ends, much of the clarification work is already done. Wine kits often recommend this method because it shortens the total time needed to bottle.
The downside is that you might need more bentonite using this method because some gets trapped in the yeast cake at the bottom.
Adding Bentonite After Fermentation
Most brewers prefer to add bentonite after fermentation completes. Wait at least 48 hours after fermentation stops, or even better, wait until you rack the beer or wine off the yeast cake into a secondary fermenter.
Adding bentonite post-fermentation gives you more control. You can see how clear the beverage already is and adjust the dosage accordingly. You also avoid any risk of the bentonite affecting yeast activity, though this risk is minimal.
For beer with malolactic fermentation, wait until that secondary fermentation completes before adding bentonite. The same goes for any beer or wine that will undergo extended aging. Add bentonite as one of the final steps before bottling or kegging to naturally use bentonite in primary fermentation for improved clarity and stability.
Proper Dosage: How Much Bentonite to Use
Getting the dosage right prevents problems and delivers the best results. For beer, start with 3 to 9 grams per 5 gallons. Light, delicate beers like pilsners need less, around 3 to 5 grams. Heavier beers with more protein, like stouts or porters, might need up to 9 grams.
For wine, the range is broader because protein content varies widely. White wines typically need 1 to 2 grams per gallon because they contain more unstable proteins. Red wines need less, around 0.5 to 1 gram per gallon, because they have fewer proteins and because bentonite can strip color from reds.
Never add bentonite to hazy IPAs, New England IPAs, or wheat beers where the haze is desirable. Also avoid using it on red wines unless you’re dealing with a protein haze problem, as it can remove the anthocyanins that give red wine its color.
The golden rule: start low and increase if needed. You can always add more bentonite, but you can’t take it back once it’s in your fermenter.
Adding Bentonite to Your Brew
Once your slurry is prepared and your beer or wine is ready, the actual addition is straightforward. Make sure you’ve recently racked the beverage so there’s no thick layer of sediment on the bottom. You want the bentonite mixing with clean liquid, not stirring up old yeast and trub.
Stir the slurry one more time, then pour it slowly into your fermenter while gently stirring the beer or wine. Use a sanitized spoon or stirring rod. Stir thoroughly to distribute the bentonite evenly throughout the liquid. This distribution is critical because bentonite can’t work if it just sits in one spot.
Be gentle during stirring. You want to mix the bentonite without introducing oxygen, which can cause oxidation and off-flavors. A slow, steady stir for 30 to 60 seconds usually does the job. If you have a degassing tool for winemaking, that works perfectly for this task.
After adding the bentonite, reattach your airlock and move the fermenter to a cool location if possible. Cold temperatures speed up the settling process and enhance bentonite’s effectiveness. Room temperature works fine if you can’t chill it.
Settling Time and What to Expect
Patience is part of brewing, and bentonite requires patience. After you add the slurry, wait at least 5 to 7 days before doing anything else. During this time, resist the urge to move or disturb the fermenter.
In the first 24 to 48 hours, you’ll notice the beer or wine becoming clearer as the bentonite starts falling out of suspension. By day three or four, you should see a distinct layer of sediment forming at the bottom. This sediment is the bentonite bound to all those proteins and haze-causing particles.
Most beers and wines clear completely within 7 to 10 days. Heavy haze or wines with high protein content might take up to two weeks. The colder the storage temperature, the faster the process. At 32°F to 40°F, bentonite works most efficiently, though these temperatures aren’t practical for everyone.
Once the liquid looks crystal clear and the sediment layer has stopped growing, wait two more days to be safe. Then carefully rack the clear beer or wine off the sediment into another container or directly into bottles or kegs. Move slowly during racking to avoid disturbing the bentonite layer.
Common Mistakes and How to Avoid Them
Even experienced brewers make mistakes with bentonite. Here’s how to avoid the most common ones.
The biggest mistake is not hydrating the bentonite properly. If you add dry bentonite powder directly to your beer or wine, it will clump together and sink straight to the bottom without doing anything useful. Always make a slurry first and let it hydrate for at least an hour.
Using too much bentonite strips your beverage of desirable compounds. Proteins contribute to mouthfeel, head retention in beer, and body in wine. Over-fining creates a thin, characterless drink. Stick to the lower end of dosage recommendations and only increase if the first treatment doesn’t work.
Adding bentonite to the wrong beer styles is another common error. Hazy IPAs, wheat beers, and other styles that showcase cloudiness should never get bentonite treatment. The haze is intentional and part of the style profile.
Stirring too vigorously introduces oxygen, which causes oxidation. Your beer might develop cardboard or sherry-like flavors, and your wine can turn brown. Always stir gently but thoroughly.
Finally, don’t combine bentonite with too many other fining agents. While you can combine it with agents like Polyclar (PVPP) for comprehensive clarification, using multiple clarifiers simultaneously can overclarify and strip away too much good stuff. If you need multiple treatments, do them sequentially with settling time between each.
Bentonite’s Effect on Foam and Flavor
One concern brewers have is whether bentonite affects head retention. The answer is yes, it can, but only if you overuse it. Bentonite removes all proteins non-selectively, including foam-positive proteins that create stable heads on beer.
Research has shown that bentonite impacts foam more than some other fining agents like silica gel, which specifically targets haze proteins while sparing foam proteins. That’s why proper dosage matters so much. At recommended levels, the effect on head retention is minimal and usually not noticeable.
As for flavor, properly dosed bentonite should not alter the taste of your beer or wine. It’s a neutral clay that settles completely out of the beverage. Some brewers report an “earthy” taste when they use too much bentonite, but this is rare and easily avoided by staying within recommended amounts.
Bentonite can actually improve flavor in some cases by removing off-flavors associated with protein degradation and by reducing oxidation potential. Clearer beverages also tend to showcase hop and fruit aromatics better because there are fewer particles disrupting the aromatic compounds.
Quality Matters: Choosing the Right Bentonite Supplier
When sourcing bentonite for brewing, quality and consistency matter. CMS Industries maintains ISO 9001:2015 certification and produces multiple grades of bentonite from strategically located mines in Gujarat’s Kachchh region. Their facilities can produce over 9,000 metric tons monthly, ensuring reliable supply for commercial brewers and serious home brewers alike.
Look for suppliers who understand food-grade requirements and can provide consistent particle size and purity. Industrial bentonite may contain impurities or additives unsuitable for brewing. Food-grade bentonite is refined and tested to meet safety standards.
For brewers in India, working with a domestic supplier like CMS Industries offers advantages beyond quality. Shorter supply chains mean fresher product, lower shipping costs, and easier communication if you have technical questions or specific requirements.
Bentonite in Professional Brewing
Commercial breweries and wineries rely heavily on bentonite for stabilization and clarification. The brewing industry uses bentonite primarily for chillproofing, which prevents protein-polyphenol haze from forming when beer sits on cold store shelves.
Professional brewers often combine bentonite with other treatments. A common approach pairs bentonite (for protein removal) with PVPP or Polyclar (for polyphenol removal), creating comprehensive stability. Some breweries use silica gel instead of bentonite because it specifically targets haze proteins while preserving foam proteins.
The commercial brewing process also includes bench trials, where brewers test different bentonite dosages on small samples before treating entire tanks. This testing prevents the costly mistake of over-treating large batches. Home brewers can adopt this practice by testing bentonite on a small portion of their batch before treating the full volume.
Frequently Asked Questions
Can I use bentonite for all beer styles?
No, bentonite should not be used on beer styles where haze is desirable. Avoid using it on New England IPAs, hazy IPAs, wheat beers, and hefeweizens. These styles showcase cloudiness as part of their character. Bentonite works best on lagers, pilsners, pale ales, and other styles that should be crystal clear.
How long does prepared bentonite slurry last?
Once prepared, bentonite slurry remains usable for about one week if stored in a sealed, sanitized container in the refrigerator. The bentonite will settle, so stir it thoroughly before use. For best results, prepare fresh slurry each time you need it rather than making large batches.
Will bentonite remove yeast completely?
Bentonite helps yeast settle and creates a more compact sediment layer, but it does not remove all yeast cells. You’ll still have enough yeast for bottle conditioning if you’re naturally carbonating. If you want completely yeast-free beer or wine, you’ll need to filter or use additional fining agents after bentonite treatment.
Can I combine bentonite with other fining agents like gelatin?
Yes, but use them sequentially rather than simultaneously. A common approach treats with bentonite first to remove proteins, waits for it to settle, racks the beer off the sediment, then treats with gelatin or isinglass for final polishing. Allow proper settling time between treatments. Avoid using more than two fining agents total to prevent over-clarification.
Does bentonite work better in wine or beer?
Bentonite works differently in wine versus beer because of pH and protein content differences. Wine has higher acidity (lower pH) where proteins carry stronger positive charges, making bentonite binding more effective. Beer has higher pH where bentonite must work harder. Both applications succeed when you follow proper dosage and preparation guidelines. White wines typically respond best to bentonite treatment, while red wines need careful dosing to avoid color loss.